Refectocil Eyelash Tint Instructions: A Comprehensive Guide
Refectocil offers a professional-grade system for achieving beautifully tinted eyelashes and eyebrows. This guide details the process, from preparation to aftercare, ensuring optimal and long-lasting results.
Understanding the nuances of Refectocil application is key to a successful outcome, delivering a defined and natural look.
Understanding Refectocil
Refectocil is a globally recognized brand specializing in professional eyelash and eyebrow tinting systems. Developed in Austria, it’s renowned for its high-quality pigments and long-lasting results, offering a semi-permanent color solution for enhancing natural lashes and brows. Unlike DIY home tint kits, Refectocil is formulated for use by trained professionals, ensuring safety and precision.
The system isn’t simply about color; it’s a comprehensive approach to defining the eyes. Refectocil’s formulations are designed to coat each individual lash, creating a fuller, darker appearance without the need for mascara. Similarly, for eyebrows, it fills in sparse areas and shapes the brow line, providing a polished and well-groomed look.
A key aspect of understanding Refectocil lies in its two-part system: the tint itself and the developer (available in liquid or cream form). The developer activates the tint, allowing the color to penetrate the hair shaft. Proper mixing ratios and processing times are crucial for achieving the desired intensity and avoiding irritation. The brand offers a diverse color range, allowing for customization to suit individual preferences and skin tones.
What is Refectocil?
Refectocil is a professional hair dye specifically formulated for eyelashes and eyebrows, offering a semi-permanent coloring solution. It’s not a mascara or temporary dye; instead, it penetrates the hair shaft to deliver rich, lasting color for several weeks. This Austrian-made product is a favorite among beauty professionals due to its reliability and consistent results.
The core of Refectocil lies in its unique dye formulation. It’s designed to be gentle yet effective, minimizing the risk of irritation when applied correctly. Unlike some at-home tinting kits, Refectocil requires a separate developer – either a liquid or cream oxidant – to activate the color. This two-step process allows for precise control over the tinting process.
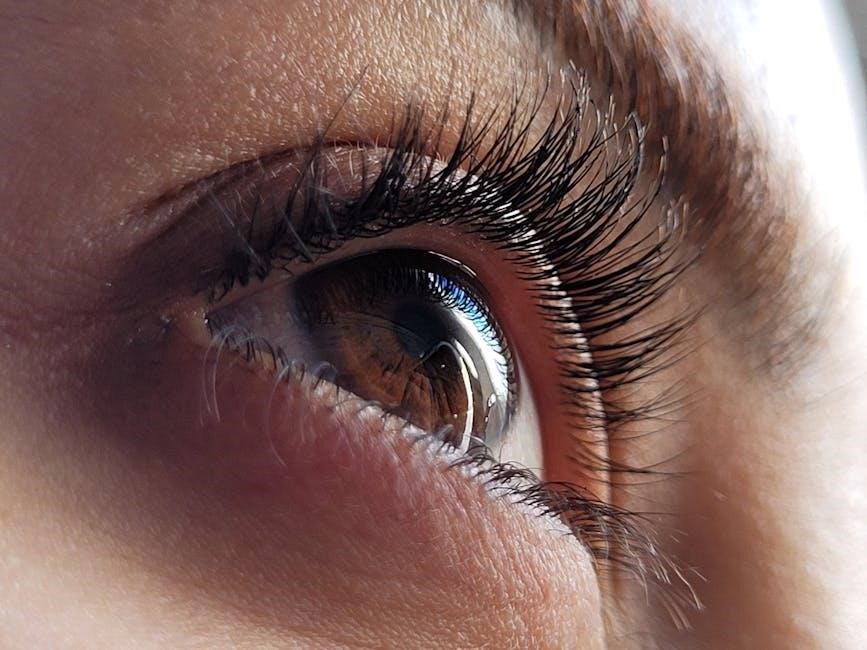
Refectocil doesn’t just add color; it defines and enhances. For lashes, it creates the appearance of thicker, darker lashes, reducing or eliminating the need for mascara. For brows, it shapes and fills in sparse areas, providing a polished, groomed look. It’s a popular choice for those seeking a low-maintenance beauty solution.
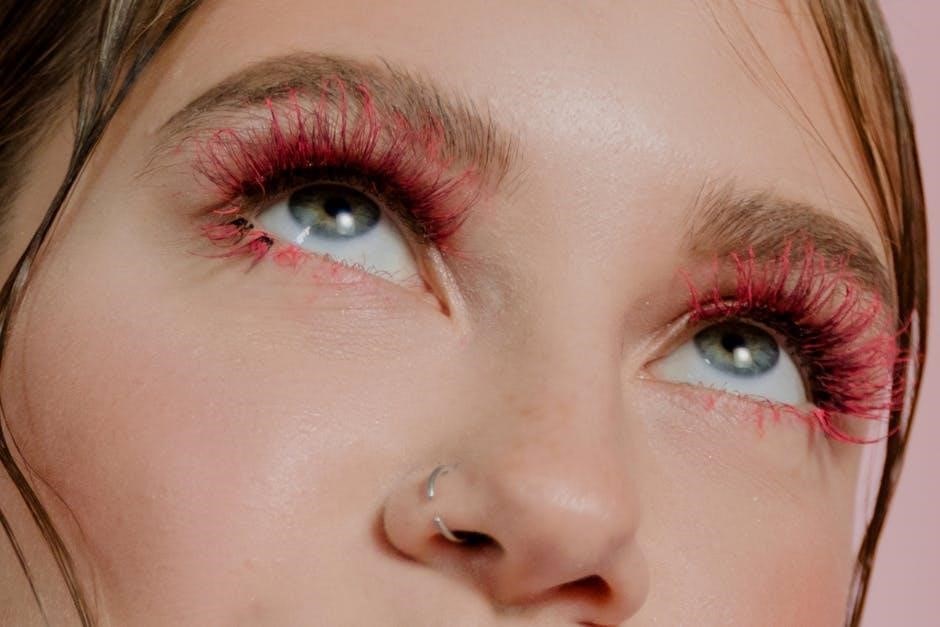
Refectocil Color Range
Refectocil boasts an extensive color palette, catering to a diverse range of skin tones and desired looks. The standard range includes Black, Brown, Blue-Black, and Chestnut, offering classic options for natural enhancement. However, the possibilities expand significantly with the addition of mixing shades.
For customized color creation, Refectocil provides Tint Bases – Red, Blonde, and Brown. These bases allow professionals to tailor the shade precisely to the client’s preferences. For instance, adding a touch of Red base to Brown can create warmer, auburn tones, while Blonde base lightens darker shades for a softer effect.
The “Intense” range further broadens the spectrum, offering deeper, more vibrant colors. RefectoCil Intense Browns, for example, provide rich, chocolatey hues. Choosing the right color is crucial; lighter shades are ideal for fair skin and hair, while darker shades suit those with darker complexions. Careful consideration ensures a harmonious and flattering result.
Benefits of Using Refectocil
Refectocil offers numerous advantages over traditional mascara, providing a semi-permanent solution for defined lashes and brows. The tinting process enhances natural features, creating a polished look that lasts for several weeks, reducing the daily need for makeup. This is particularly beneficial for individuals with active lifestyles or sensitivities to cosmetics.
Beyond convenience, Refectocil is known for its gentle formula, minimizing irritation compared to some other tinting products. The professional-grade quality ensures long-lasting color and a natural appearance, avoiding the clumpy or artificial look sometimes associated with mascara.
Furthermore, tinted lashes and brows visually enhance eye shape and definition, creating a more awake and youthful appearance. It’s a cost-effective solution in the long run, eliminating the frequent repurchase of mascara. Refectocil empowers individuals to confidently embrace a low-maintenance beauty routine, enjoying a consistently defined look.
Preparation for Refectocil Application
Prior to application, a patch test is essential to check for sensitivities. Gather all necessary supplies and meticulously protect the skin surrounding the eyes with a barrier cream or pads.
Patch Test: A Crucial First Step
Before embarking on a full Refectocil application, performing a patch test is absolutely non-negotiable. This vital step helps determine if you or your client has any adverse reactions or sensitivities to the tint. It’s a preventative measure that can save you from discomfort, irritation, or even allergic reactions.
To conduct the patch test, mix a small amount of the Refectocil tint according to the instructions – using the appropriate developer. Apply a tiny dab of the mixed tint to a discreet area, such as behind the ear or on the inner elbow.
Leave the tint on for the full recommended processing time, typically around 10 minutes for eyelashes. After the allotted time, carefully remove the tint with water and observe the area for at least 24-48 hours.
Look for any signs of redness, swelling, itching, burning, or blistering. If any of these symptoms appear, do not proceed with the Refectocil application. A negative reaction to the patch test indicates a potential allergy, and using the tint could cause significant harm. Prioritize safety and always perform this crucial first step!
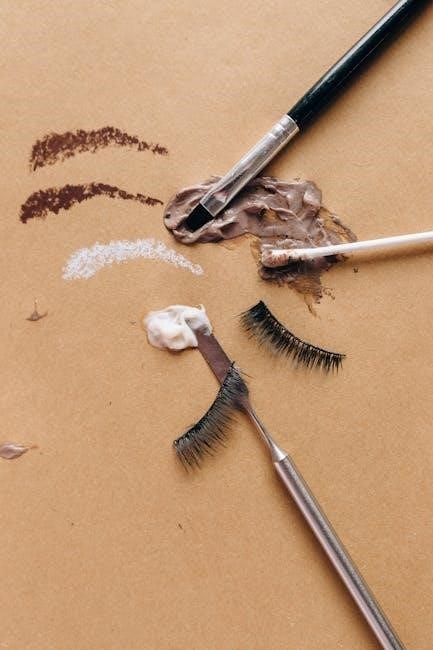
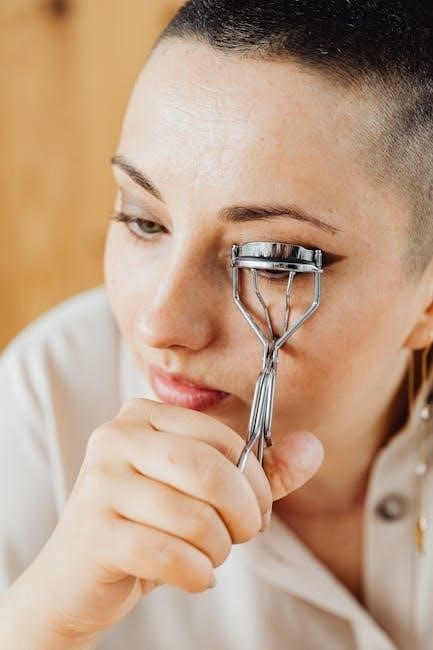
Gathering Your Supplies
Successful Refectocil application hinges on having all necessary supplies readily available. Begin with the Refectocil tint itself, selecting the desired shade – Natural Brown, Black, or Blue-Black are common choices. You’ll also need a Refectocil developer; options include the Oxidant Liquid or Oxidant Cream. The choice impacts consistency and application.
Essential tools include disposable applicators like micro brushes or tinting wands for precise tint distribution. Protective eye pads are crucial to shield the skin around the eyes from staining. Cotton swabs and pads are needed for cleanup and removing excess tint.
Consider having a mixing palette and a suitable mixing tool – a glass or ceramic dish and a stirring stick are ideal. Gloves are vital for protecting your hands. Finally, a timer is indispensable for accurate processing time.
Having everything organized before you start streamlines the process and ensures a professional, efficient, and hygienic Refectocil application. A well-stocked kit contributes significantly to achieving optimal results.
Protecting the Skin Around the Eyes
Prioritizing skin protection is paramount when performing a Refectocil tint. The skin around the eyes is delicate and highly susceptible to staining. Begin by applying protective eye pads directly beneath the lower lashes, ensuring complete coverage of the skin. These pads act as a barrier, preventing the tint from coming into contact with the skin.
For the upper lash line, a thin layer of protective cream – specifically designed for this purpose – should be carefully applied. This cream creates an additional shield, safeguarding the skin from accidental tint exposure. Ensure the cream doesn’t inadvertently get onto the lashes themselves, as this will inhibit tint adhesion.
Regularly check throughout the application process to confirm the protective barriers remain intact. Any gaps or breaches in the protection could lead to unwanted staining. A meticulous approach to skin protection is crucial for a professional and safe Refectocil experience.
Remember, preventative measures are far more effective than attempting to remove stubborn tint stains later. Thorough protection ensures a clean, precise result.
Mixing the Refectocil Tint
Proper mixing is vital for optimal color development and a smooth application. Combine 2cm of tint with either 10 drops of liquid developer or 15-20 drops of cream developer.
Stir thoroughly until a consistent, creamy paste is achieved.
Choosing the Developer: Liquid vs. Cream
Refectocil offers two developer options: Liquid and Cream, each influencing the tinting process differently. The choice depends on desired intensity, application preference, and client sensitivity. Liquid developer, typically used with 5 drops per cm of tint, is known for delivering more intense color and a faster processing time. It’s favored by professionals seeking bold results and efficient service.
Conversely, Cream developer, requiring 8-10 drops per cm of tint, provides a gentler formulation, making it ideal for sensitive skin or first-time users. The cream’s thicker consistency allows for more controlled application, minimizing the risk of product migration. While it may require slightly longer processing times, it offers a more comfortable experience and reduced potential for irritation.
Consider that cream developers can also extend the application time, potentially leading to a deeper color payoff if left on for the maximum recommended duration. Ultimately, understanding the nuances of each developer allows for a customized tinting experience, tailored to individual needs and desired outcomes. Always prioritize client comfort and perform a patch test regardless of the developer chosen.
Mixing Ratio: Tint to Developer
Achieving the correct mixing ratio is paramount for optimal Refectocil results. A precise blend ensures proper color development, minimizes irritation, and guarantees a long-lasting tint. Generally, the standard ratio is 2cm of tint mixed with 10 drops of RefectoCil Oxidant Liquid. If opting for the Cream developer, use 15-20 drops per 2cm of tint;
Deviation from these guidelines can significantly impact the final outcome. Too little developer may result in a weak, uneven color, while an excess can cause irritation and potentially damage the lashes. Consistency is key; always measure carefully using a dedicated tinting tool or dropper.
Remember that these ratios are starting points and can be slightly adjusted based on desired intensity. For a more subtle effect, slightly reduce the amount of developer. For a bolder look, adhere to the maximum recommended drops. Thoroughly blend the mixture using a tinting brush until a smooth, creamy paste is formed, free of lumps or inconsistencies. A homogenous mixture ensures even application and predictable results.
Achieving the Right Consistency
The ideal Refectocil mixture should resemble a smooth, creamy paste – not too runny, and definitely not too thick. This consistency is crucial for precise application and even color distribution. A runny mixture risks running into the eyes, causing irritation, while a thick paste is difficult to apply evenly and may not penetrate the lashes effectively.
To achieve this, stir the tint and developer vigorously with a tinting brush. Pay close attention to the sides and bottom of the mixing surface, ensuring all the tint is incorporated. If the mixture is too thick, add a single drop of developer at a time, mixing thoroughly after each addition, until the desired consistency is reached.
Conversely, if the mixture is too thin, add a tiny amount of tint, again mixing well. The final product should coat the lashes easily without dripping or clumping. A well-mixed consistency guarantees optimal color uptake and minimizes the risk of patchy or uneven results, contributing to a professional-looking finish.

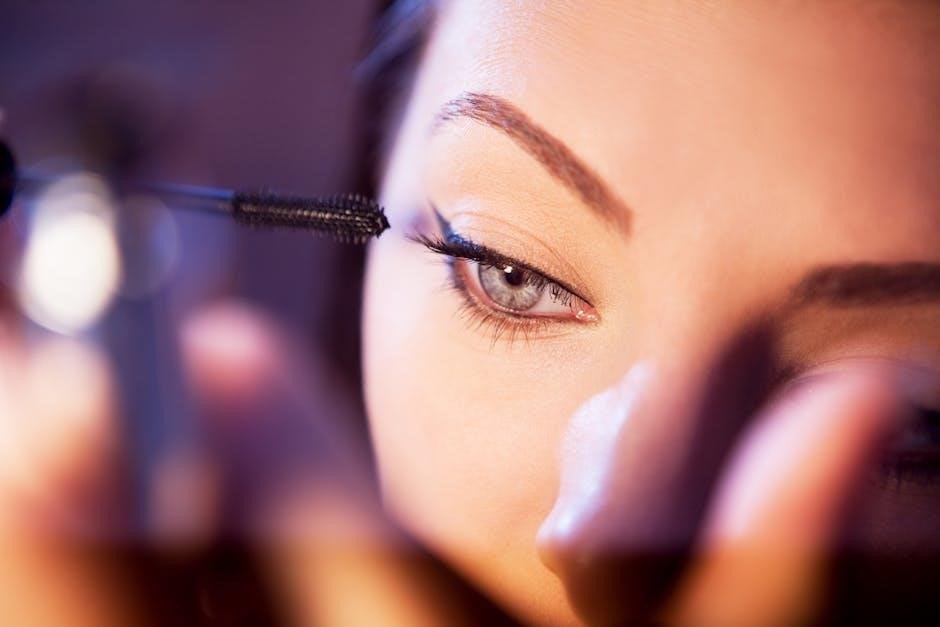
Application Process: Eyelashes
Begin by carefully applying protective pads to the lower lashes. Then, meticulously apply the Refectocil tint to the upper and lower lashes, ensuring complete coverage for a dramatic, darkened effect.
Precise application is vital!
Applying Protective Pads
Protecting the delicate skin under the eyes is paramount during Refectocil eyelash tinting. Specialized protective pads, often made of a non-woven material or hydrogel patches, are essential to prevent the tint from staining the skin and causing irritation. These pads create a barrier, ensuring a clean and professional application.
Before application, thoroughly cleanse the under-eye area to remove any makeup, oils, or lotions. This ensures optimal adhesion of the pads. Gently apply the pads directly beneath the lower lash line, ensuring they completely cover the skin from the inner corner of the eye to the outer corner. The pads should be snug but comfortable, avoiding any pressure on the eyeball.
Ensure the pads are securely in place and that no lashes are stuck to them. If any lashes are adhered, carefully use a tinting wand or micro brush to gently free them. A properly applied pad is crucial for a flawless result and client comfort. Double-check the placement before proceeding to the tint application step, guaranteeing a safe and effective treatment.
Proper pad application minimizes risks and maximizes tinting precision.
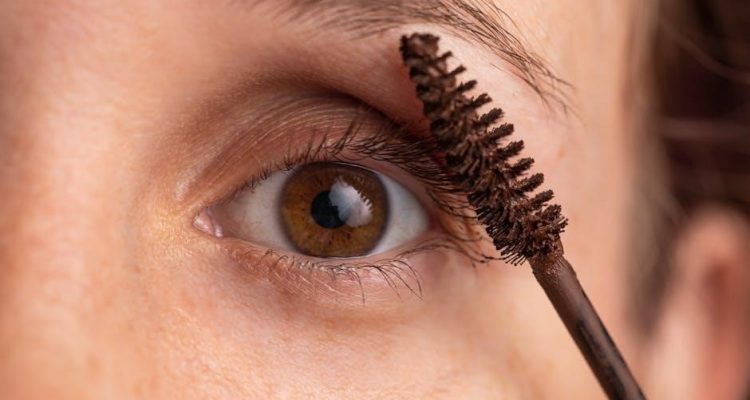
Applying the Tint to Lower Lashes
With the protective pads securely in place, begin applying the Refectocil tint to the lower lashes. Using a precision applicator – a micro brush or a tinting wand – carefully coat each lash, starting from the base and working towards the tip. Ensure every lash is fully saturated with the tint mixture for even color distribution.
Avoid getting the tint on the skin, even with the protective pads. A steady hand and precise application are key. Work slowly and methodically, separating lashes with the applicator as needed to ensure complete coverage. A thin, even layer of tint is preferable to a thick, clumpy application.
Pay close attention to the inner and outer corners of the eye, as these areas can be easily missed. Once the lower lashes are fully coated, visually inspect to confirm no lashes are left untreated. Remove any excess tint from the skin immediately with a damp cotton swab, being careful not to disturb the protective pads.
Consistent application guarantees a uniform and beautiful result on the lower lashes.
Applying the Tint to Upper Lashes
Carefully apply the Refectocil tint to the upper lashes, utilizing a micro brush or a dedicated tinting wand. Begin at the lash base, meticulously coating each lash and working outwards towards the tips. Achieving full saturation is crucial for consistent color development, ensuring every lash receives the tint evenly.
Maintaining a steady hand is paramount to prevent the tint from contacting the skin. Work slowly and deliberately, separating lashes with the applicator to guarantee complete coverage. A thin, uniform layer of tint is ideal, avoiding clumping or excessive product buildup.
Focus on the areas closest to the nose and the outer corners of the eye, as these are often overlooked. After coating all upper lashes, perform a thorough visual check to confirm no lashes remain untreated. Immediately remove any stray tint from the skin using a damp cotton swab, exercising caution not to disrupt the protective pads.
Precise application on the upper lashes is essential for a stunning, long-lasting result.
Processing Time for Eyelashes (8-10 Minutes)
Following the application of the Refectocil tint to the upper and lower lashes, the processing time is critical for achieving the desired color intensity. Generally, a processing time of 8-10 minutes is recommended, however, this can be adjusted based on individual lash thickness, desired darkness, and the specific Refectocil shade used.
Initial monitoring should begin around the 8-minute mark. Carefully check a few lashes to assess the color development. If a deeper shade is desired, processing can be extended up to a maximum of 10 minutes. Exceeding this timeframe is not advised, as it may lead to overly dark or potentially damaging results.
Factors influencing processing time include the product itself and the client’s natural lash color. Lighter lashes typically require a longer processing time than darker lashes. Throughout the process, ensure the client remains comfortable and avoid any disturbance to the applied tint and protective pads.
Consistent monitoring during the 8-10 minute window is key to a perfect tint.

Application Process: Eyebrows
To begin eyebrow tinting, apply a protective cream around the brow area, shielding the skin. Then, carefully apply the mixed Refectocil tint to the eyebrows, ensuring full coverage for optimal color.
Applying Protective Cream
Before applying the Refectocil tint to the eyebrows, it’s absolutely crucial to protect the surrounding skin. This is achieved using a specialized protective cream, designed to create a barrier against the tint and prevent unwanted staining. The cream should be applied generously around the entire eyebrow area, effectively encapsulating the brow shape.
Ensure the layer of cream is thick enough to fully shield the skin, paying particular attention to the delicate areas above and below the brow. A small, precise applicator brush is ideal for this task, allowing for controlled and accurate application. Avoid getting any cream on the eyebrow hairs themselves, as this will inhibit the tint from adhering properly.
The protective cream acts as a safeguard, preventing the tint from grabbing onto the skin and causing discoloration. Once applied, allow a few moments for the cream to settle before proceeding with the tint application. This step is non-negotiable for a clean, professional result and client satisfaction. Remember to remove the cream thoroughly after the tinting process is complete.
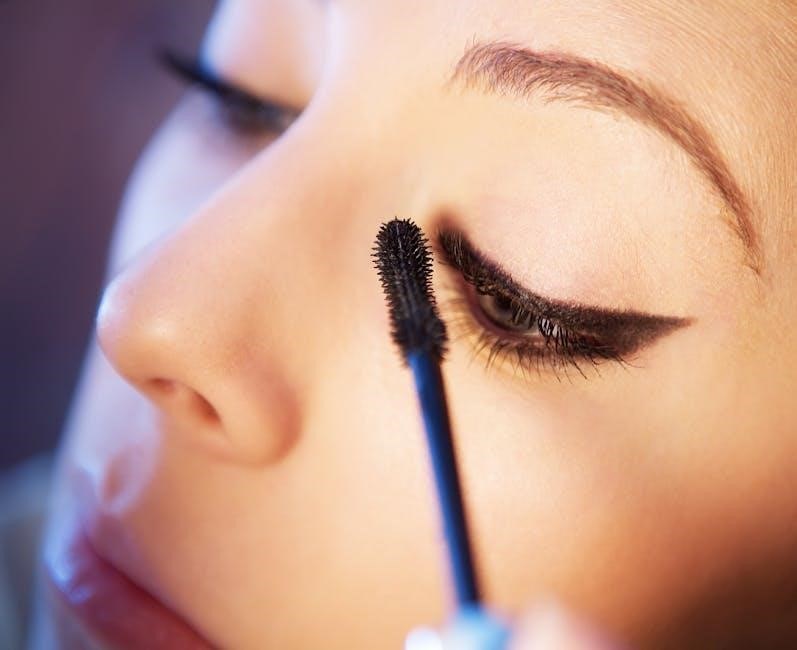
Applying the Tint to Eyebrows
With the protective cream meticulously applied, you can now proceed to apply the Refectocil tint to the eyebrows. Using a precision applicator – a small angled brush works exceptionally well – carefully coat each eyebrow hair, ensuring complete coverage from root to tip. Follow the natural shape of the brow, filling in any sparse areas for a fuller appearance.
Work systematically, applying the tint in smooth, even strokes. Avoid applying the tint directly onto the skin, as this can cause irritation or unwanted staining, despite the protective cream. A thin, consistent layer is preferable to a thick, uneven one. Take your time and pay attention to detail, as this will significantly impact the final result.
Once both eyebrows are fully coated, double-check for any missed hairs and address them promptly. The goal is to achieve uniform color distribution throughout the brows. Remember, processing times typically range from 5 to 10 minutes, depending on the desired intensity and the specific Refectocil shade used.
Processing Time for Eyebrows (5-10 Minutes)
The processing time for Refectocil eyebrow tint is crucial for achieving the desired color intensity. Generally, a timeframe of 5 to 10 minutes is recommended, but this can be adjusted based on individual hair thickness, desired darkness, and the specific Refectocil shade utilized. Lighter shades typically require a longer processing time, while darker shades achieve optimal results within the shorter range.
Begin by timing the process immediately after application. It’s vital to adhere to the recommended timeframe to prevent over-processing, which can lead to an overly dark or unnatural color. Regularly check the color development, especially if it’s your first time using the product or a new shade. A small test area can be helpful.
During the processing time, advise the client to keep their eyes closed and remain still. The longer the tint remains on the brows – up to the 10-minute maximum – the more intense the color will become. Carefully monitor the progress and proceed to removal once the desired shade is achieved;
Removal and Aftercare
Proper removal with cotton wool and water is essential. Avoid oil-based products for 24-48 hours to maximize tint longevity. Hydrate lashes and brows for optimal results!
Removing the Tint
The removal process is straightforward, yet crucial for achieving the best possible results and preventing any irritation. Begin by gently wiping the eyelashes and eyebrows with a damp cotton pad. Avoid harsh rubbing, as this can cause discomfort and potentially irritate the delicate skin around the eyes.
Continue using fresh, damp cotton pads until all traces of the tint have been removed. You’ll notice the water on the cotton pad gradually becoming clearer as the tint is lifted. Ensure you meticulously remove the tint from both the upper and lower lashes, as well as from the eyebrow area.
For any stubborn residue, a mild, oil-free cleanser can be used on a cotton pad, but always follow up with a thorough rinse with water. It’s important to avoid using oil-based products during the initial removal phase, as oil can interfere with the complete lifting of the tint.
Once you’re confident that all the tint has been removed, gently pat the area dry with a clean, soft towel. Avoid rubbing, and be mindful of the sensitive skin around the eyes. A final check in a well-lit area will ensure complete removal.
Post-Tint Aftercare Instructions
To maximize the longevity and vibrancy of your Refectocil tint, diligent aftercare is essential. For the first 24-48 hours, avoid getting your lashes or brows wet. This includes showering, swimming, saunas, and even excessive sweating during exercise. Water can hinder the full development of the tint and potentially cause fading.
Refrain from using oil-based makeup removers, cleansers, or skincare products around the eyes during this initial period. Oils can break down the tint molecules, shortening the duration of the color. Opt for oil-free alternatives instead. Avoid mascara and brow pencils for at least 24 hours to allow the tint to fully set.
Gentle handling is key. Avoid rubbing or pulling at your lashes or brows, as this can disrupt the tint and cause irritation. When cleansing your face, be particularly careful around the eye area.
To further prolong the color, consider using a lash and brow conditioning serum. This will help keep your lashes and brows healthy and strong, enhancing the overall appearance of the tint. Enjoy your beautifully tinted lashes and brows!
Troubleshooting: Common Issues and Solutions
Uneven color development can occur if the tint isn’t applied consistently or if processing times vary across the lashes/brows. Ensure thorough application and adhere strictly to recommended timing – 8-10 minutes for lashes, 5-10 for brows.
If the tint is too light, the mixing ratio may be incorrect. Double-check you’re using the correct amount of developer (5 drops liquid/8-10 drops cream per cm of tint). A slightly longer processing time (within the safe limits) can also intensify the color.
Irritation or redness is rare but possible. Immediately rinse with cool water if this occurs. A patch test is crucial to identify sensitivities beforehand. Discontinue use if irritation persists.
Tint fading prematurely often results from oil-based products or excessive water exposure. Follow aftercare instructions diligently, avoiding oils and keeping the area dry for 24-48 hours. If issues persist, consult a professional.
Remember, proper preparation, precise mixing, and careful application are vital for a flawless Refectocil experience.